DEPLOYING A 2-TIER ARCHITECTURE ON AWS USING TERRAFORM MODULES
Deploying and managing infrastructure can be a complex and time-consuming task. Terraform, an open-source infrastructure as code (IaaC) tool, simplifies the process by automating the provisioning, configuration, and management of cloud infrastructure.
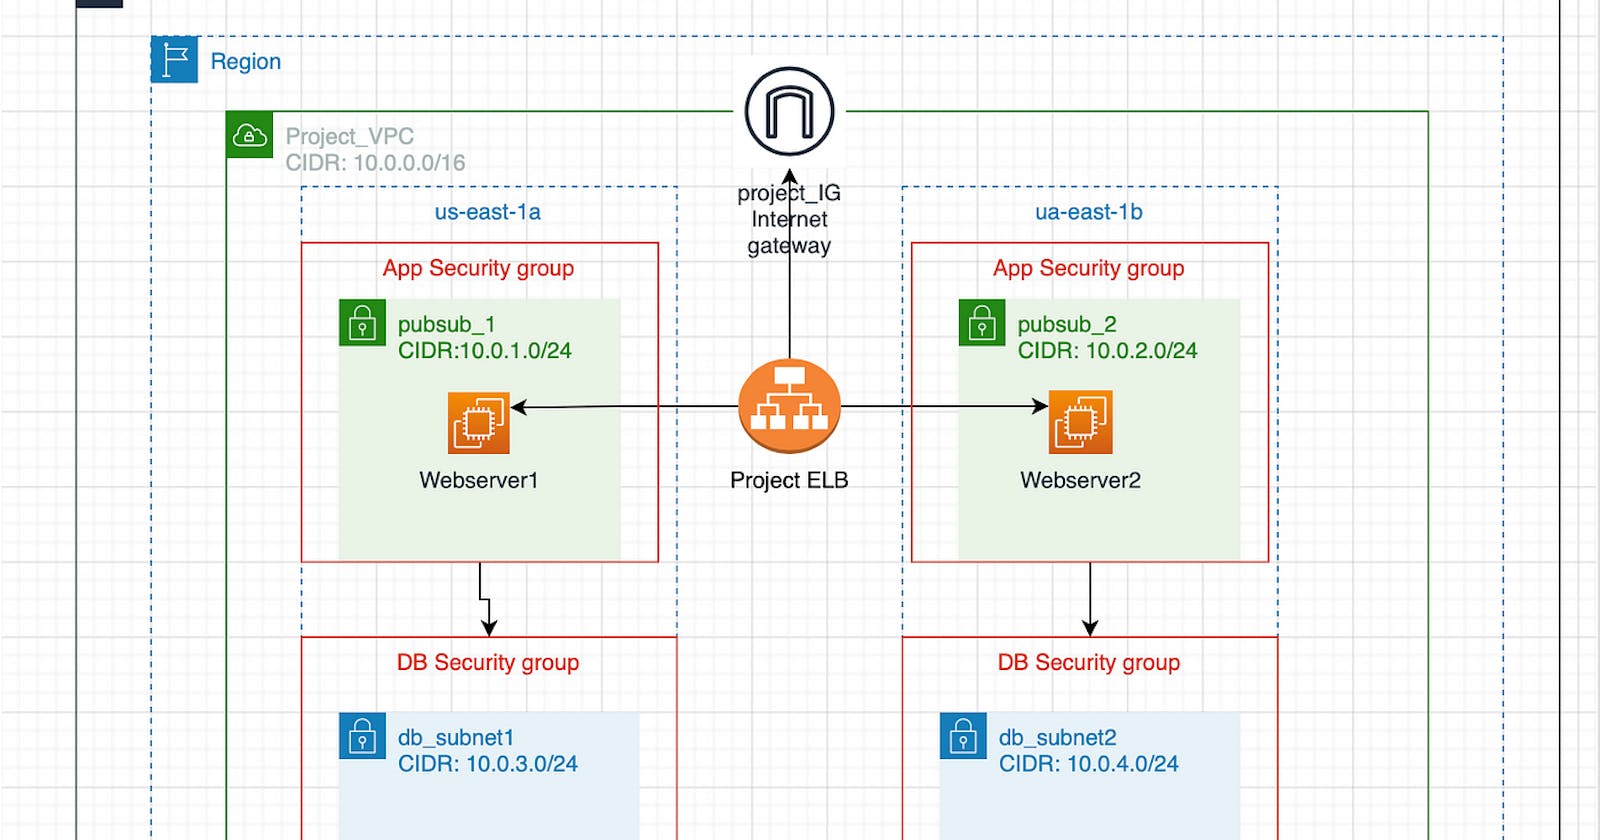
The article provides a step-by-step guide on how to diagram and deploy the architecture. The architecture includes multiple public subnets, private subnets, availability zones, and EC2 instances to create a robust infrastructure. The article also includes diagrams to help visualize the structure and connections of the components involved.
2-Tier Architecture Overview
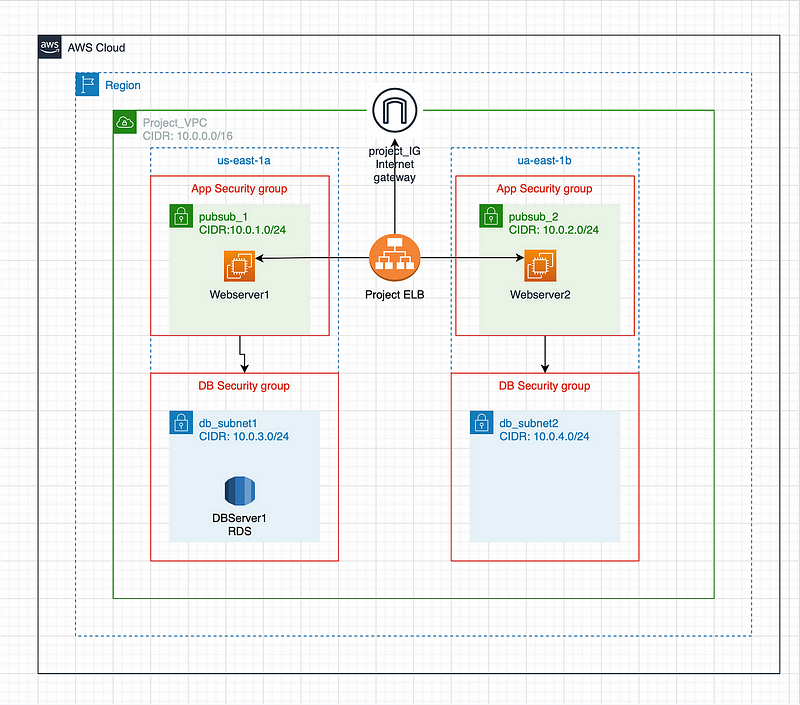
A 2-tier architecture is a common architectural pattern for web applications. It consists of two main components:
Presentation Tier: This tier handles user interactions and displays the application’s user interface (UI). It typically consists of web servers running web servers like Apache or Nginx.
Data Tier: This tier stores and manages the application’s data. It typically consists of databases like MySQL or PostgreSQL.
Prerequisites
Before deploying a 2-tier architecture on AWS using Terraform, you will need the following:
An AWS account
The AWS CLI tool installed and configured
Terraform installed on your local machine
Step 1: Create the Root Module
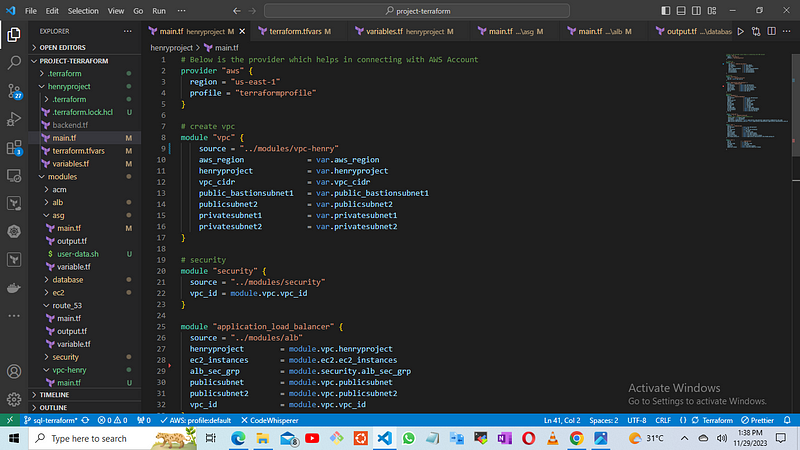
The root module is the main Terraform configuration file that defines the overall infrastructure for the 2-tier architecture. It references the various child modules that create the individual components of the architecture.
Create a directory named project and create the following files inside it:
main.tf file
variable.tf file
terraform.tfvars file
backend.tf file
touch main.tf
The main.tf this will contain the ROOT MODULE configuration
the root module will reference all the different modules that i created and configured used in deploying the aws resources that is needed to deploy the 3- tier architecture
for ease of understanding i will provide the link for the configuration
The resources in this root module include:
The AWS provider resources: You configure the provider and the region you wish to deploy your whole architecture in. In the article, the author uses us-east-1.
The VPC resource module: A VPC with 2 public subnets and two private subnets is created via the VPC module. In order to direct internet traffic to public subnets, it constructs an internet gateway and generates route tables and route table associations. The CIDR blocks are properly configured for the network.
The Security-Groups module: This creates the security groups for each different tier and makes sure one tier can access the next tier.
The Application Load Balancer: This will be used to create our Application load balancer. This module creates the target audience, the listener, and the application load balancer for internet-facing applications. Traffic will be routed to the public subnets.
Database: The Database module creates the resources for our RDS MySQL database instance and subnet group.
Route 53: The Route 53 module creates the resources for the DNS records and the name of the
Auto scaling group: this module provides the template the server is created or ec2 instance is created and also provides the bash script for the user data for ease of access into the web application
Ec2 instance: this module provides the resource we use to deploy the server
https://github.com/A-LPHARM/terraform_modules/blob/sql-terraform/henryproject/main.tf
STEP 2.
touch variable.tf FILE
this will contain the variables that reference from the main.tf file
for reference
https://github.com/A-LPHARM/terraform_modules/blob/sql-terraform/henryproject/variables.tf
# Below is the variable block
variable “aws_region” { }
variable “henryproject” {}
variable “vpc_cidr” {}
variable “public_bastionsubnet1” {}
variable “publicsubnet2” {}
variable “privatesubnet1” {}
variable “privatesubnet2” {}
variable “identifier” {}
variable “ami_id” { }
variable “instance_type” {}
variable “key_name” { }
variable “engine” { }
variable “engine_version” { }
variable “db_name” { }
variable “db_username” { }
variable “db_password” { }
variable “storage” { }
variable “storage_type” { }
variable “domain_name” { }
variable “sub_domain” { }
touch terrform.tfvars
the terraform.tfvars file is used to define all the values used in the child modules variables file.
https://github.com/A-LPHARM/terraform_modules/blob/sql-terraform/henryproject/terraform.tfvars
aws_region = “us-east-1”
henryproject = “henryproject”
vpc_cidr = “10.0.0.0/16”
public_bastionsubnet1 = “10.0.1.0/24”
publicsubnet2 = “10.0.3.0/24”
privatesubnet1 = “10.0.5.0/24”
privatesubnet2 = “10.0.100.0/24”
ami_id = “ami-0889a44b331db0194”
instance_type = “t2.micro”
key_name = “henriksinkay”
engine = “mysql”
engine_version = “8.0.32”
identifier = “db-mysql”
db_name = “projt_database1”
db_username = “Admin”
db_password = “He5n4rypha7r2m6a5cy51ED”
storage = “200”
storage_type = “gp3”
domain_name = “alpharm.click”
sub_domain = “www”
then we create the modules folder where will contain the modules needed to deploy the infrastructure
each module will contain
the main.tf file
the varibales.tf file
the output.tf
Create modules FOLDER
mkdir modules
step 3.
create the vpc modules
cd modules
mkdir vpc
touch main.tf
touch variables.tf
touch output.tf
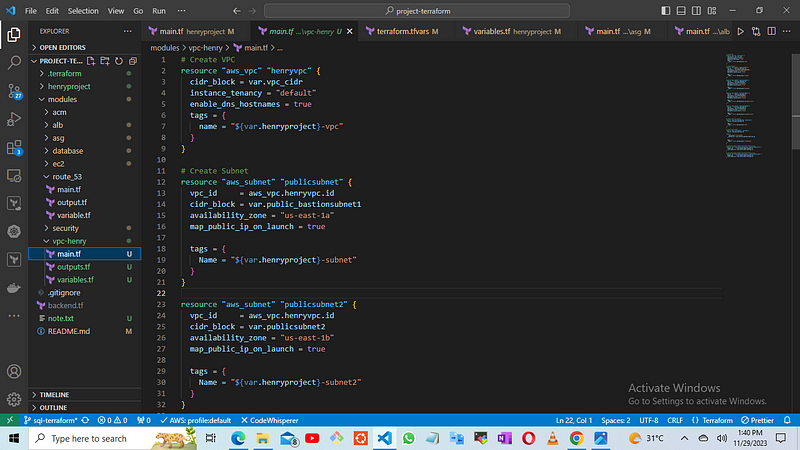
The main.tf configuration will be set up to orchestrate the creation of a Virtual Private Cloud (VPC). Subsequently, it will establish two public subnets and two private subnets. Additionally, an Internet Gateway resource will be generated to facilitate internet access for the public subnets. A routing table specific to the public subnets will be implemented, directing traffic towards the Internet Gateway. Finally, the public subnets will be associated with this routing table.
Also, you will notice that most values are stored in variables; this is a better practice than hard coding the values.
https://github.com/A-LPHARM/terraform_modules/blob/sql-terraform/modules/vpc-henry/main.tf
Then create the variables block for the vpc module
copy
https://github.com/A-LPHARM/terraform_modules/blob/sql-terraform/modules/dynamodb-henry/variables.tf
# Below is the variable block
variable "aws_region" { }

variable "henryproject" {}

variable "vpc_cidr" {}

variable "public_bastionsubnet1" {}

variable "publicsubnet2" {}

variable "privatesubnet1" {}

variable "privatesubnet2" {}
We won’t be defining all the modules in the variables files initially. Instead, we’ll use the tfvars file within the root module later for that purpose. Following this, we’ll proceed to generate the outputs for the VPC modules, referencing the variables as needed.
Output
https://github.com/A-LPHARM/terraform_modules/blob/sql-terraform/modules/dynamodb-henry/outputs.tf
output "henryproject" {
    value = var.henryproject
}

output "vpc_id" {
    value = aws_vpc.henryvpc.id
}

output "publicsubnet" {
    value = aws_subnet.publicsubnet.id
}

output "publicsubnet2" {
    value = aws_subnet.publicsubnet2.id
}

output "privatesubnet1" {
    value = aws_subnet.privatesubnet1.id
}

output "privatesubnet2" {
    value = aws_subnet.privatesubnet2.id
}

output "Internetgateway" {
    value = aws_internet_gateway.publicig
}
Outputs export values from an existing module to be used by other modules, including the root module.
For example, if I need to reference my vpc id as an attribute for my security group. I will export my vpc id in outputs, then enter the output name as a variable in the security group module as var.vpc_id, then add vpc_id to my security group variable list, then define it in the root module as module.vpc.vpc_id
STEP 4: Create and Configure Security Group Modules
Create a directory named security to house the security group modules.
Within the security directory, create three separate files:
main.tf : This file will contain the Terraform configuration for defining the security groups.
variable.tf : This file will define the variables used by the security group modules.
outputs.tf: This file will define the output values produced by the security group modules.
Copy the contents of the main.tf file from the provided GitHub repository
https://github.com/A-LPHARM/terraform_modules/blob/sql-terraform/modules/security/main.tf
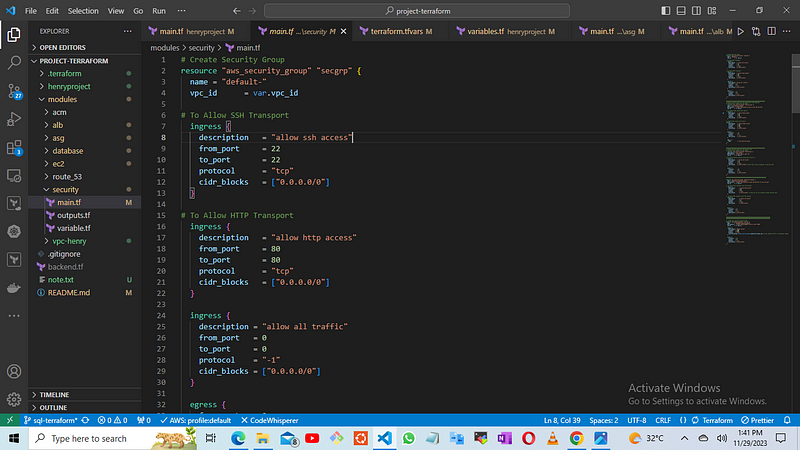
Modify the variable.tf file to define the specific security group rules and parameters required for your environment.
Customize the outputs.tf file to specify the output values you want to expose from the security group modules.
The variable.tf file for the security group module
copy
https://github.com/A-LPHARM/terraform_modules/blob/sql-terraform/modules/security/variable.tf
variable “vpc_id” {}
the output.tf file for the security
copy
https://github.com/A-LPHARM/terraform_modules/blob/sql-terraform/modules/security/outputs.tf
output "alb_sec_grp" {
value = aws_security_group.alb_sec_grp.id
}
output "aws_security_group" {
value = aws_security_group.secgrp.id
}
output "ssh-secgrp" {
value = aws_security_group.ssh-secgrp.id
}
output "webserver-secgrp" {
value = aws_security_group.webserver-secgrp.id
}
output "rds_sg" {
value = aws_security_group.rds_sg.id
}
STEP 5: Create and Configure Application Load Balancer (ALB) Module
Create a directory named alb to house the ALB module.
Within the alb directory, create three separate files:
main.tf : This file will contain the Terraform configuration for defining the ALB resources.
variable.tf : This file will define the variables used by the ALB module.
outputs.tf: This file will define the output values produced by the ALB module.
Copy the contents of the main.tf file from the provided GitHub repository
https://github.com/A-LPHARM/terraform_modules/blob/sql-terraform/modules/alb/main.tf
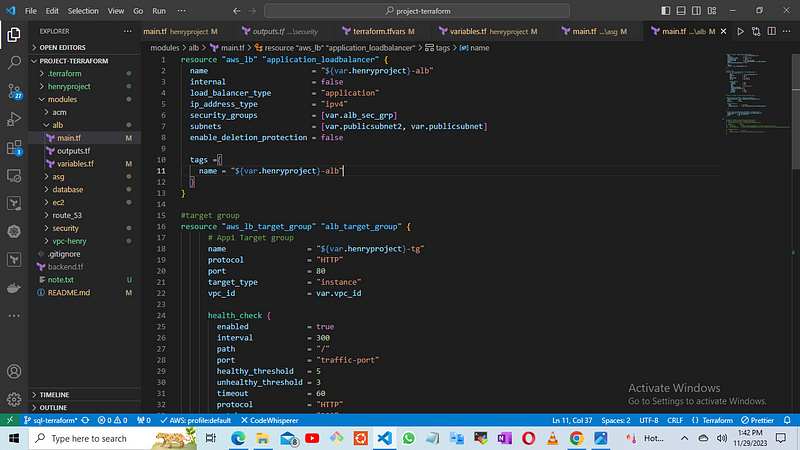
Modify the variable file to define the specific ALB configuration parameters required for your environment.
Customize the outputs.tf file to specify the output values you want to expose from the ALB module.
resource "aws_lb" "application_loadbalancer" {
  name                       = "${var.henryproject}-alb"
  internal                   = false
  load_balancer_type         = "application"
  ip_address_type            = "ipv4"
  security_groups            = [var.alb_sec_grp]
  subnets                    = [var.publicsubnet2, var.publicsubnet]
  enable_deletion_protection = false

  tags ={
    name = "${var.henryproject}-alb"
  }
}

#target group
resource "aws_lb_target_group" "alb_target_group" {
      # App1 Target group
      name                  = "${var.henryproject}-tg"
      protocol              = "HTTP"
      port                  = 80
      target_type           = "instance"
      vpc_id                = var.vpc_id

      health_check {
        enabled             = true
        interval            = 300
        path                = "/"
        port                = "traffic-port"
        healthy_threshold   = 5
        unhealthy_threshold = 3
        timeout             = 60
        protocol            = "HTTP"
        matcher             = "200"
      }
}
#create a listener on port 80 with forward action

resource "aws_lb_listener" "alb_http_listener" {
  load_balancer_arn = aws_lb.application_loadbalancer.arn
  port              = 80
  protocol          = "HTTP"

  default_action {
    type                  = "forward"
    target_group_arn      = aws_lb_target_group.alb_target_group.arn

   }
}

resource "aws_lb_target_group_attachment" "target_group" {
  target_group_arn = aws_lb_target_group.alb_target_group.arn
  target_id        = var.ec2_instances
  port             = 80
}
then we create the variable.tf files with reference from root modules
https://github.com/A-LPHARM/terraform_modules/blob/sql-terraform/modules/alb/variables.tf
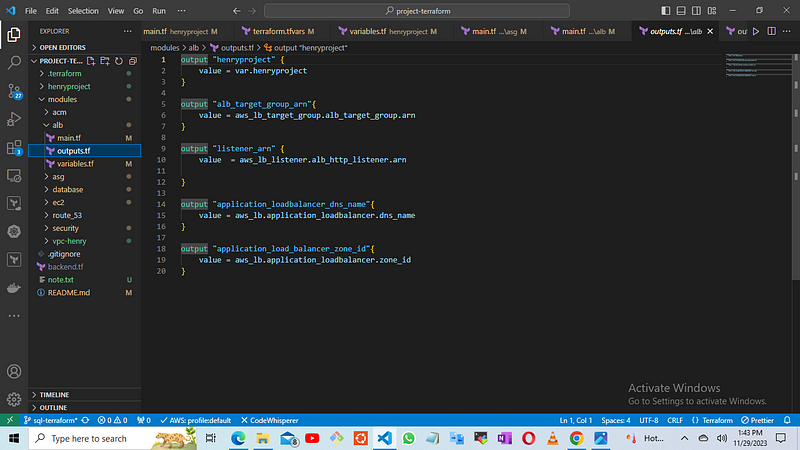
then we create the output.tf
copy
https://github.com/A-LPHARM/terraform_modules/blob/sql-terraform/modules/alb/outputs.tf
STEP 6: Create and Configure Database Module
Create a directory named database to house the database module.
Within the data-base directory, create three separate files:
main.tf : This file will contain the Terraform configuration for defining the database resources.
variables.tf : This file will define the variables used by the database module.
outputs.tf : This file will define the output values produced by the database module.
Copy the contents of the main.tf file from the provided GitHub repository
https://github.com/A-LPHARM/terraform_modules/blob/sql-terraform/modules/database/main.tf
# Create the MySQL RDS database instance
resource "aws_db_instance" "mysql_instance" {
  engine                  = var.engine
  engine_version          = var.engine_version
  instance_class          = "db.t2.micro"
  allocated_storage       = var.storage
  storage_type            = var.storage_type
  availability_zone       = "us-east-1a"
  identifier              = var.identifier
  db_name                 = var.db_name
  username                = var.db_username
  password                = var.db_password
  port                    = 3306
  multi_az                = false
  publicly_accessible     = true
  skip_final_snapshot     = true
  db_subnet_group_name    = aws_db_subnet_group.subnetdb.id
  vpc_security_group_ids  = [ var.rds_sg ]

  tags = {
    Name = "myrds"
  }
}

resource "aws_db_subnet_group" "subnetdb" {
  name       = "subnetdb"
  subnet_ids = [var.privatesubnet1 , var.privatesubnet2]

   tags = {
     Name = "${var.henryproject}-Dbsubnet"
  }
}
Modify the variables.tf file to define the specific database configuration parameters required for your environment, including the database instance type, engine version, and private subnet.
then you customize the outputs.tf file to specify the output values you want to expose from the database module.
copy
https://github.com/A-LPHARM/terraform_modules/blob/sql-terraform/modules/database/variables.tf
variable "engine" { }

variable "engine_version" { }

variable "db_name" { }

variable "db_username" { }

variable "db_password" { }

variable "storage" { }

variable "identifier" { }

variable "storage_type" { }

variable "privatesubnet1" { }

variable "privatesubnet2" { }

variable "henryproject" { }

variable "rds_sg" { }
The Outputs.tf file
we use the resource to provide the value of each output
copy
https://github.com/A-LPHARM/terraform_modules/blob/sql-terraform/modules/database/output.tf
output "mysql_instance" {
  value = aws_db_instance.mysql_instance.id
}

output "subnetdb" {
  value = aws_db_subnet_group.subnetdb.id
}
STEP 7.
SETTING UP ROUTE 53
In this phase, the focus shifts to establishing the Route 53 configuration. This involves using the DNS records and essential settings to enable communication with the Application Load Balancer.
To initiate this process, create the following directory structure:
mkdir route-53
cd route-53
touch main.tf
touch variable.tf
touch output.tf
For the Route 53 module, key components include the main.tf file, variable.tf file, and output.tf file. These files collectively define the hosted zone resource and the DNS record resource.
Access the main.tf file for the Route 53 module on the git repo
https://github.com/A-LPHARM/terraform_modules/blob/sql-terraform/modules/route_53/main.tf
 # get hosted zone details
 data "aws_route53_zone" "hosted_zone" {
   name = var.domain_name   #this is the domain name and a variable was created so as not to make it completely open
 }

 # create a record set in route 53
 resource "aws_route53_record" "domain_site" {
   zone_id = data.aws_route53_zone.hosted_zone.zone_id
   name    = var.sub_domain
   type    = "A"

   alias {
     name                   =  var.application_loadbalancer   # aws_lb.application_loadbalancer.dns_name
     zone_id                =  var.application_load_balancer_zone_id
     evaluate_target_health =  true
   }
 }
the variable.tf file will also contain
copy
https://github.com/A-LPHARM/terraform_modules/blob/sql-terraform/modules/route_53/variable.tf
 variable "domain_name" { }

 variable "sub_domain" { }

 variable "application_loadbalancer" { }

 variable "application_load_balancer_zone_id" { }
the output.tf will contain the output of the address
copy
https://github.com/A-LPHARM/terraform_modules/blob/sql-terraform/modules/route_53/output.tf
 output "domain" {
     value = aws_route53_record.domain_site.alias[0]
 }
STEP 8.
AUTOSCALING GROUP SETUP
In this stage, we configure the Auto Scaling Group (ASG). The process involves creating a template utilizing the ASG launch template and integrating user data into the template for deploying EC2 instances on the public subnet. Additionally, configurations for the Auto Scaling Group resource are provided.
To initiate this setup, create the following directory structure:
mkdir autoscaling_group
cd autoscaling_group
touch main.tf
touch variable.tf
touch outputs.tf
touch userdata.sh
For the Auto Scaling Group module, the main components include the main.tf file, variable.tf file, outputs.tf file, and userdata.sh file. Access the main.tf file for the Auto Scaling Group module
https://github.com/A-LPHARM/terraform_modules/blob/sql-terraform/modules/asg/main.tf

the variable.tf
copy
https://github.com/A-LPHARM/terraform_modules/blob/sql-terraform/modules/asg/variable.tf
variable "instance_type" {}
variable "ami_id" { }
variable "key_name" { }
variable "publicsubnet" { }
variable "publicsubnet2" { }
variable "henryproject" { }
variable "webserver-secgrp" { }
variable "alb_target_group_arn" { }
variable "ec2_instances" { }
then the
copy
https://github.com/A-LPHARM/terraform_modules/blob/sql-terraform/modules/asg/output.tf
output "autoscaling_group_name" {
description = "The name of the created Auto Scaling Group."
value = aws_autoscaling_group.asg.name
}
output "aws_launch_name" {
description = "The name of the created Launch Configuration."
value = aws_launch_template.asg_launch_template.name
}
here we insert a bash script to build your application in your ec2 instance when creating it
#!/bin/bash
sudo yum install wget unzip httpd -y
mkdir -p /tmp/webfiles
cd /tmp/webfiles
wget https://www.tooplate.com/zip-templates/2098_health.zip
unzip 2098_health
rm -rf 2098_health.zip
cd 2098_health
cp -r * /var/www/html/
systemctl start httpd
systemctl enable httpd
rm -rf /tmp/webfiles
STEP 9
EC2 INSTANCE MODULE SETUP
To finalize our infrastructure, we are now establishing the folder for the last module responsible for configuring the EC2 instances. This module will house the necessary resources for defining the EC2 instances within the environment.
Create the module directory and essential files as follows:
mkdir ec2_instances
cd ec2_instances
touch main.tf
touch variable.tf
touch outputs.tf
Inside the main.tf file, incorporate the specific configurations by copying from
https://github.com/A-LPHARM/terraform_modules/blob/sql-terraform/modules/ec2/main.tf
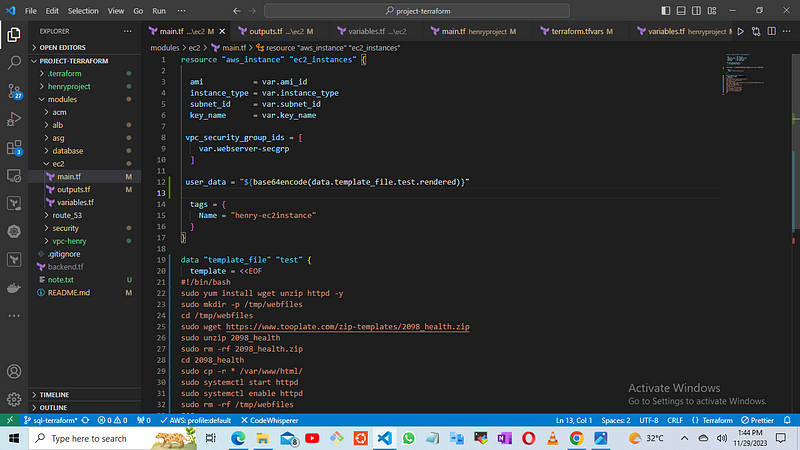
then we use the variables to reference from the main.tf file
variable "subnet_id" {}
variable "webserver-secgrp" { }
variable "ami_id" { }
variable "instance_type" {}
variable "key_name" { }
the outputs will be used to declare the instances built
https://github.com/A-LPHARM/terraform_modules/blob/sql-terraform/modules/ec2/outputs.tf
AFTER YOU HAVE CONCLUDED WITH THE FILES
enter into the root module
cd henryproject
To deploy any infrastructure as code using Terraform, After you have downloaded and confirmed the latest version of terraform 1.6.0 configured your AWS access keys, we now run the commands in the working directory where you wrote all the terraform files.
terraform init
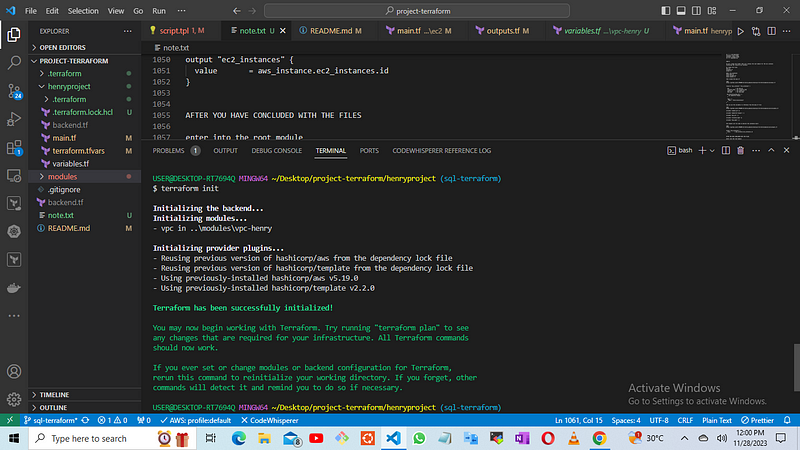
then execute the next command
terraform validate
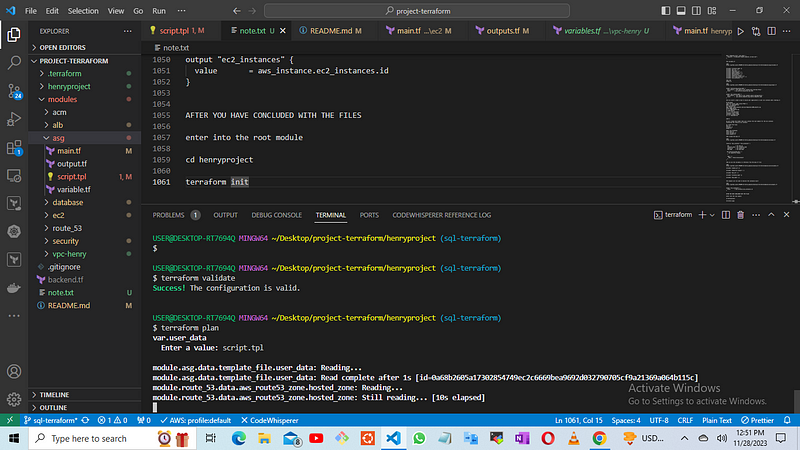
execute the command
terraform plan
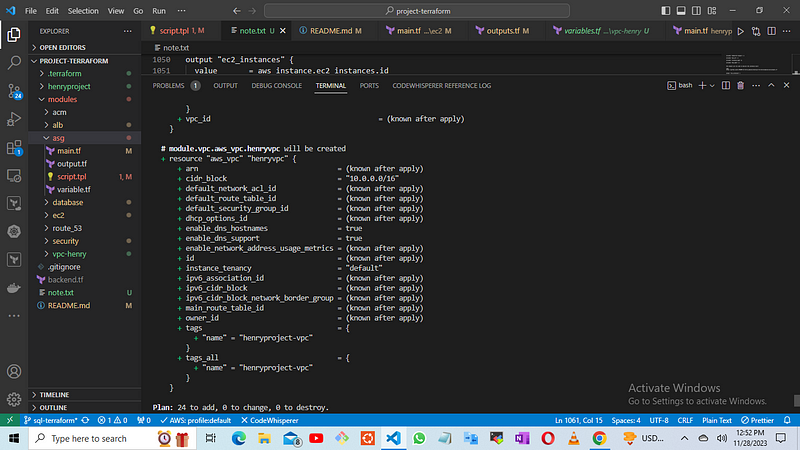
Then execute the final step
terraform apply


you can interact with the application by

lets check AWS and the services provisioned, the ec2 instances, the load balancers, route table, the internet gateway, the subnets, the data base is running
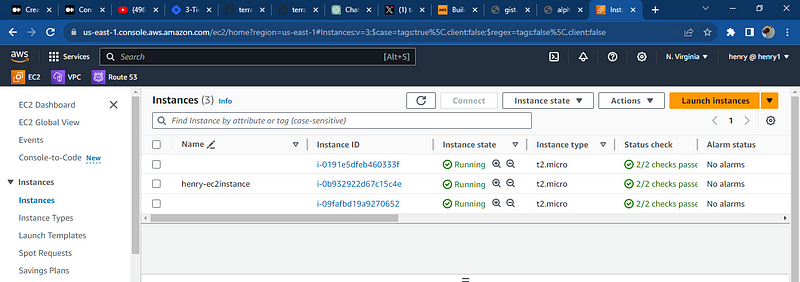
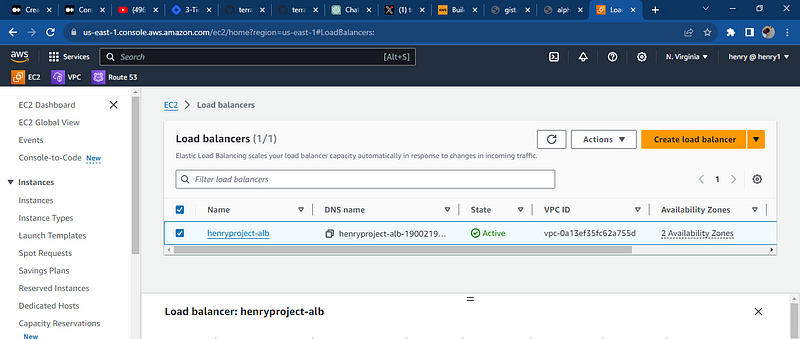
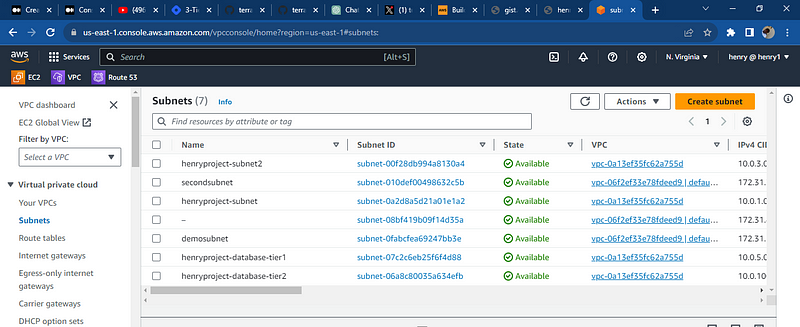


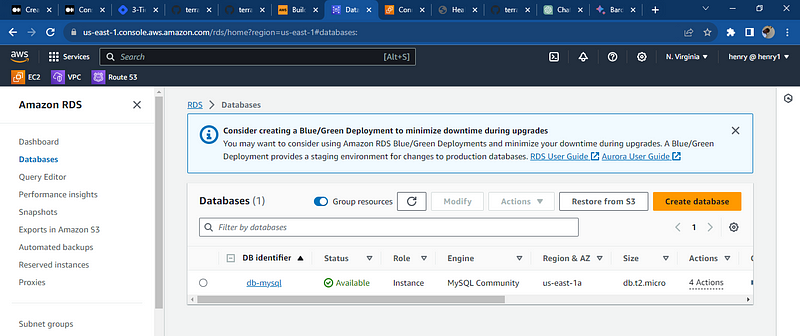
All resources were deployed successfully and databases was deploy note: the key pair to access the database using the bastion subnet the security needs to be reconfigured to your local i.p and port so you access it through your local computer, the key pair can also be used to communicate with the application server hosting the web app.
Now lets clean up
run
terraform destroy


All resources created has been deleted with one single click. Thank you for following this article, there may be several flaws on this project and article feel free to comment and contact me on twitter and linkedln
