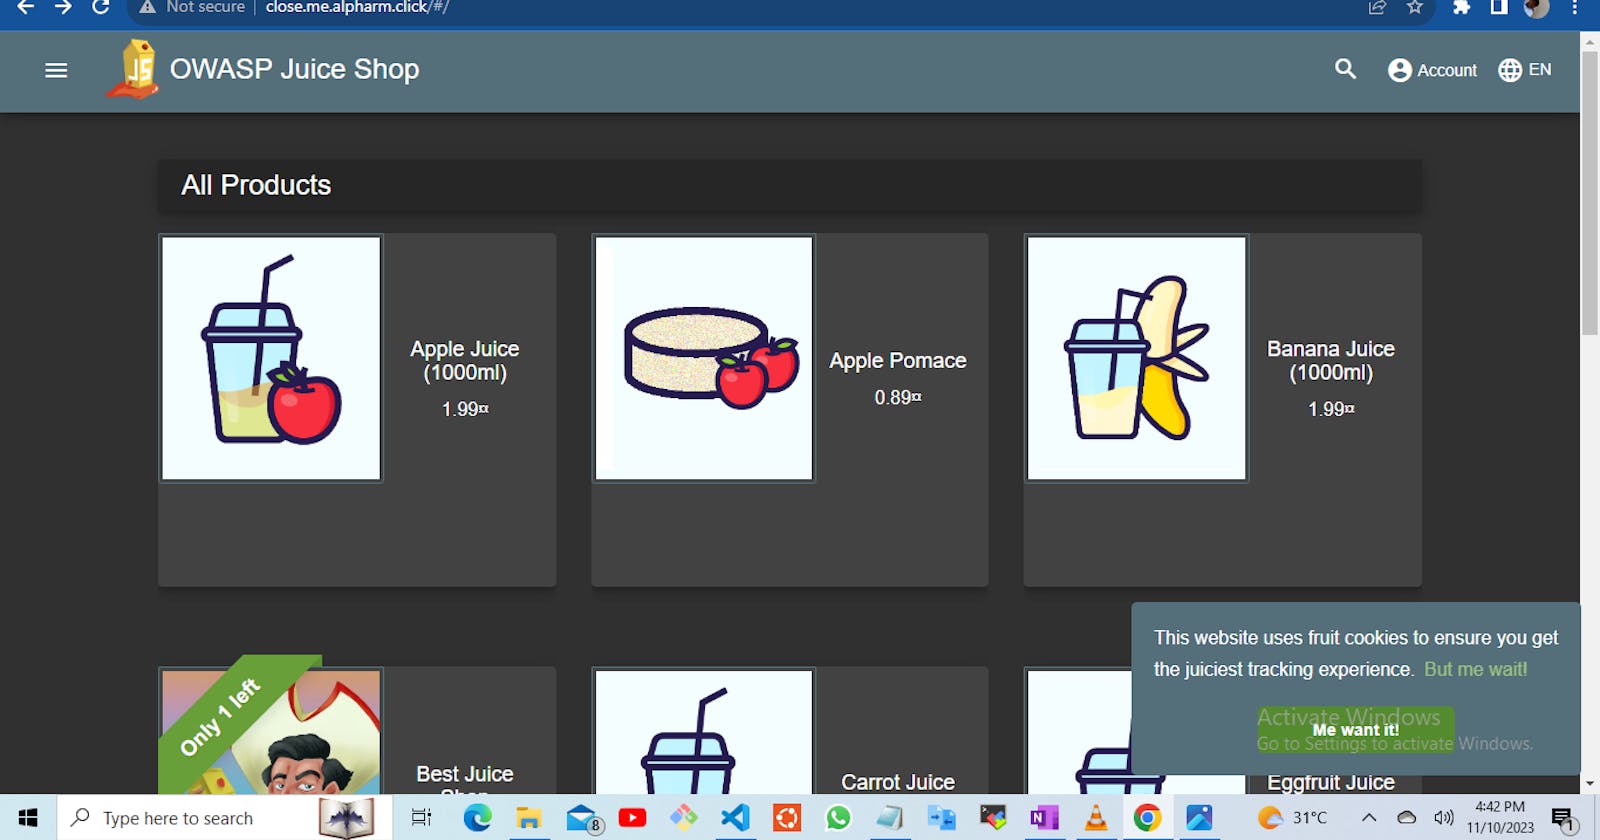
Deploying Your Application on Kubernetes with Helm Nginx Ingress and Route 53 Integration
— -
Introduction:
Deploying applications on Kubernetes involves a series of steps, and using Helm along with Nginx Ingress simplifies this process. In this guide, i will walk you through setting up a Kubernetes cluster using kops on AWS, configuring Helm and Nginx Ingress, deploying an application (in this case, my-juice-shop), and integrating it with AWS Route 53 for domain routing.
— -
Step 1: Configure kops for Your Kubernetes Cluster:
# Create IAM group
aws iam create-group — group-name kops
# Create IAM user
aws iam create-user - user-name kops
# Attach user to the group
aws iam add-user-to-group - user-name kops - group-name kops
# Attach IAM policies to the group
# … (see your specific policies, e.g., AmazonEC2FullAccess, AmazonRoute53FullAccess, etc.)
# AmazonEC2FullAccess Permission
aws iam attach-group-policy - policy-arn arn:aws:iam::aws:policy/AmazonEC2FullAccess - group-name kops;
# Attach AmazonRoute53FullAccess Permission
aws iam attach-group-policy - policy-arn arn:aws:iam::aws:policy/AmazonRoute53FullAccess - group-name kops;
# Attach AmazonS3FullAccess Permission
aws iam attach-group-policy - policy-arn arn:aws:iam::aws:policy/AmazonS3FullAccess - group-name kops;
# Attach IAMFullAccess Permission
aws iam attach-group-policy - policy-arn arn:aws:iam::aws:policy/IAMFullAccess - group-name kops;
# Attach AmazonVPCFullAccess Permission
aws iam attach-group-policy - policy-arn arn:aws:iam::aws:policy/AmazonVPCFullAccess - group-name kops;
# Attach AmazonSQSFullAccess Permission
aws iam attach-group-policy - policy-arn arn:aws:iam::aws:policy/AmazonSQSFullAccess - group-name kops;
# Attach AmazonEventBridgeFullAccess Permission
aws iam attach-group-policy - policy-arn arn:aws:iam::aws:policy/AmazonEventBridgeFullAccess - group-name kops;
# Create access key for the user
aws iam create-access-key - user-name kops
# Configure AWS client
aws configure
# Export access and secret keys
export AWS_ACCESS_KEY_ID=$(aws configure get aws_access_key_id)
export AWS_SECRET_ACCESS_KEY=$(aws configure get aws_secret_access_key)
…
Step 2: Create a Unique S3 Bucket for kops State Store:
# Generate a unique random name for the bucket
export BUCKET_NAME=”kops-$(LC_ALL=C tr -dc ‘a-z0–9’ </dev/urandom | head -c 13 ; echo)” && echo $BUCKET_NAME

# Enable versioning for the bucket
aws s3api put-bucket-versioning - bucket $BUCKET_NAME - versioning-configuration Status=Enabled
# Store cluster name and S3 bucket in environment variables
export NAME=henry-new-kops.k8s.local
export KOPS_STATE_STORE=s3://$BUCKET_NAME
…
Step 3: Create SSH Key:
# Generate SSH key
ssh-keygen
…
Step 4: Create Your Kubernetes Cluster:
# Create the cluster with kops
kops create cluster — name ${NAME} \
 — cloud=aws — networking calico \
 — zones us-east-1a,us-east-1b,us-east-1c \
 — master-size t2.medium — node-size t2.medium \
 — node-count=3 — master-count=1
# Export SSH key to kops state
kops create secret — name $NAME sshpublickey admin -i ~/.ssh/id_rsa.pub
# Build and validate the cluster
kops update cluster — name ${NAME} — yes — admin
kops validate cluster — name ${NAME} — wait 10m
…
Step 5: Install Helm:
for windows
# Install Helm
choco install kubernetes-helm
for mac
# Install Helm
brew install helm
…
Step 6: Add NGINX Ingress Helm Repo:
# Add NGINX Ingress repo
helm repo add nginx https://helm.nginx.com/stable
…
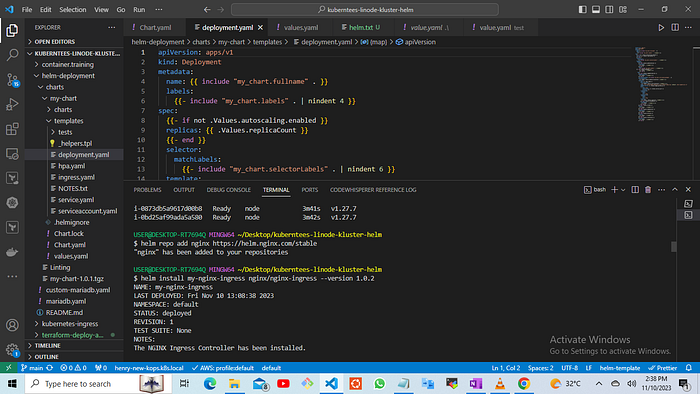
Step 7: Install NGINX Ingress:
# Install NGINX Ingress from the repo
helm install my-nginx-ingress nginx/nginx-ingress — version 1.0.2
…
Step 8: Install Your Application (e.g., my-juice-shop):
# Add application repo
helm repo add securecodebox https://charts.securecodebox.io/

# Install the application
helm install my-juice-shop securecodebox/juice-shop - version 4.3.0
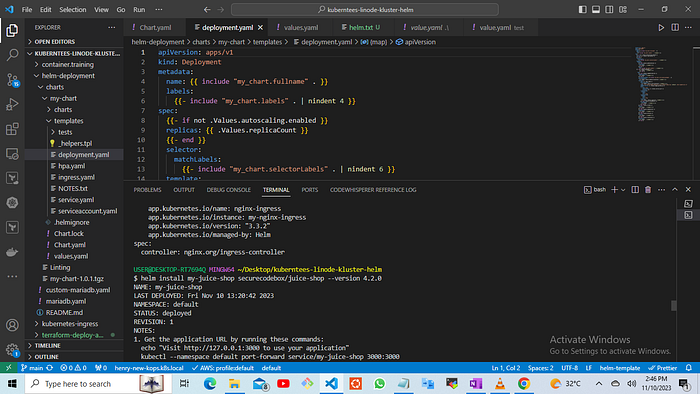
# Then set the node port to connect with application load balancer
helm upgrade my-juice-shop juice/juice-shop - set service.type=LoadBalancer
…
Step 9: Connect NGINX Ingress to Your Application Load Balancer:
# create a values.yaml file
# and modifying values.yaml)
# By creating a values.yaml file and run
# To obtain the details
i. Visit the artifactory hub
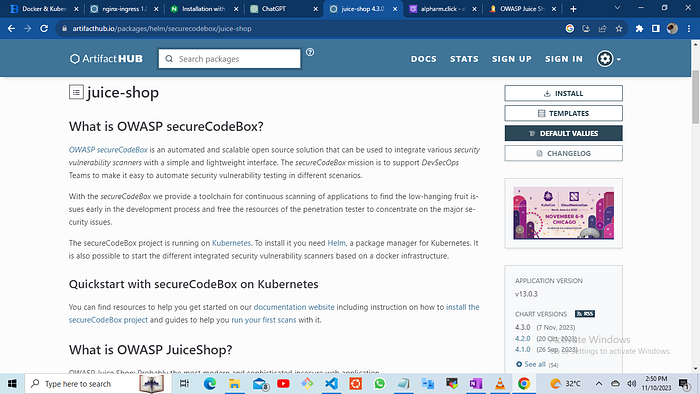
ii. Click on the values
iii. Copy and paste from ingress path
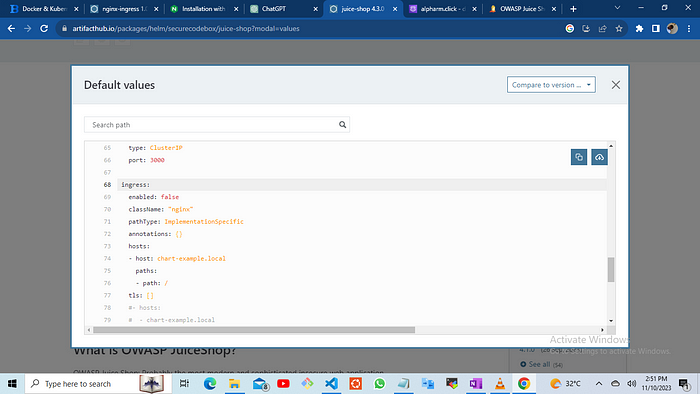
iv. modify the necessary values
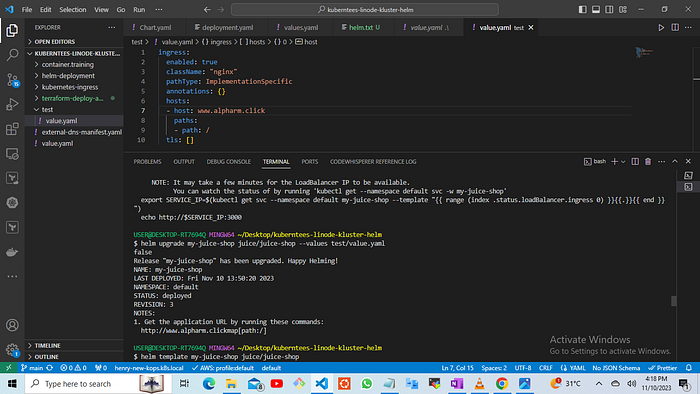
# Run the upgrade command
helm upgrade my-juice-shop juice/juice-shop - values test/values.yaml
…
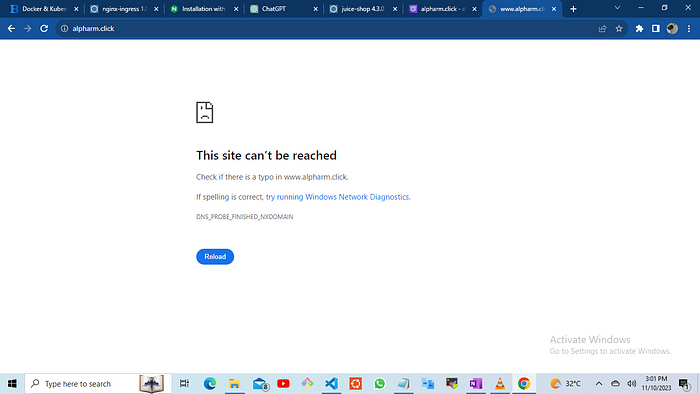
Check on the website to see if it work
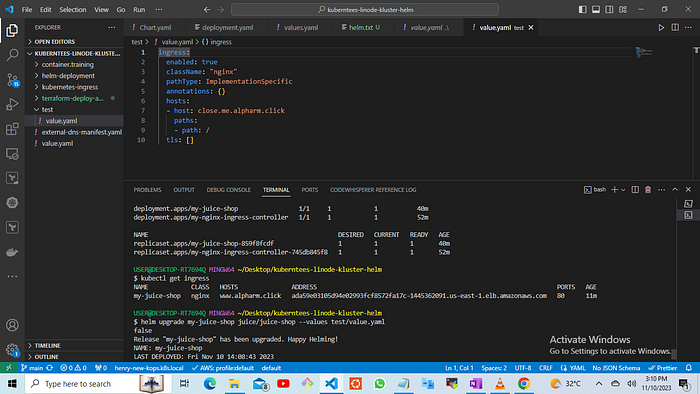
# Confirm that the ingress is connected
Kubectl get ingress
…
Step 10: Modify Route 53 on AWS:
- Go to Route 53 on the AWS console.
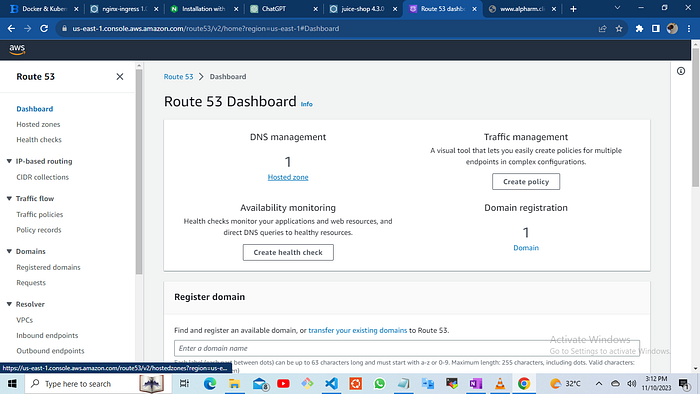
- Click on Hosted Zones and then the specific zone.
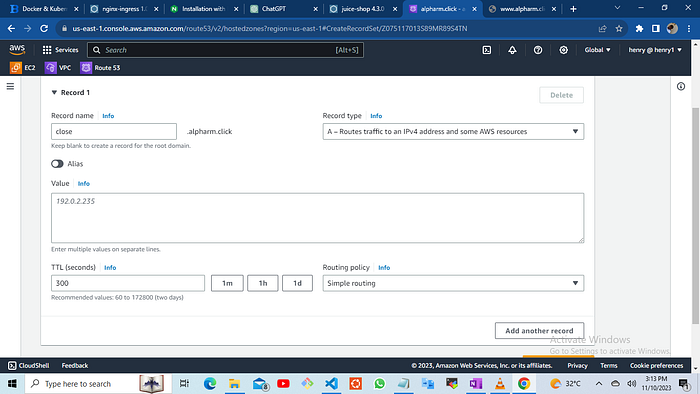
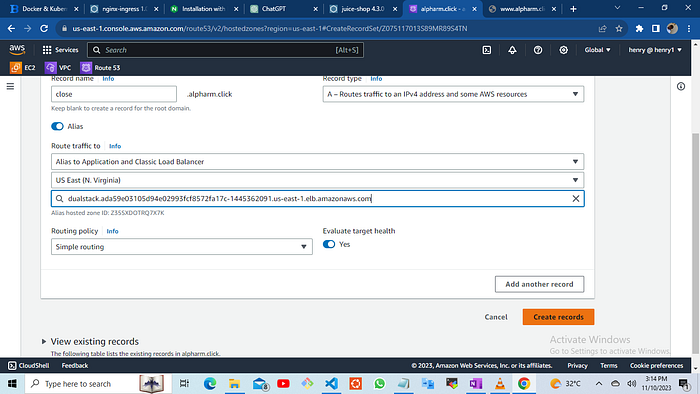
- Create a record for your subdomain, routing traffic to the Load Balancer.

- Copy the Load Balancer’s address.
…
Step 11: Modify values.yaml for Route 53 Integration:
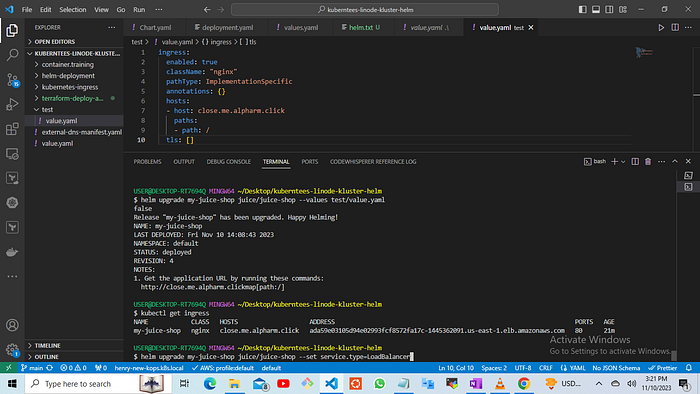
- Update the values.yaml file with your domain information.
…
Step 12: Run the Upgrade Command:
# Run the upgrade command with the path to the yaml
helm upgrade my-juice-shop juice/juice-shop — values test/values.yaml
…
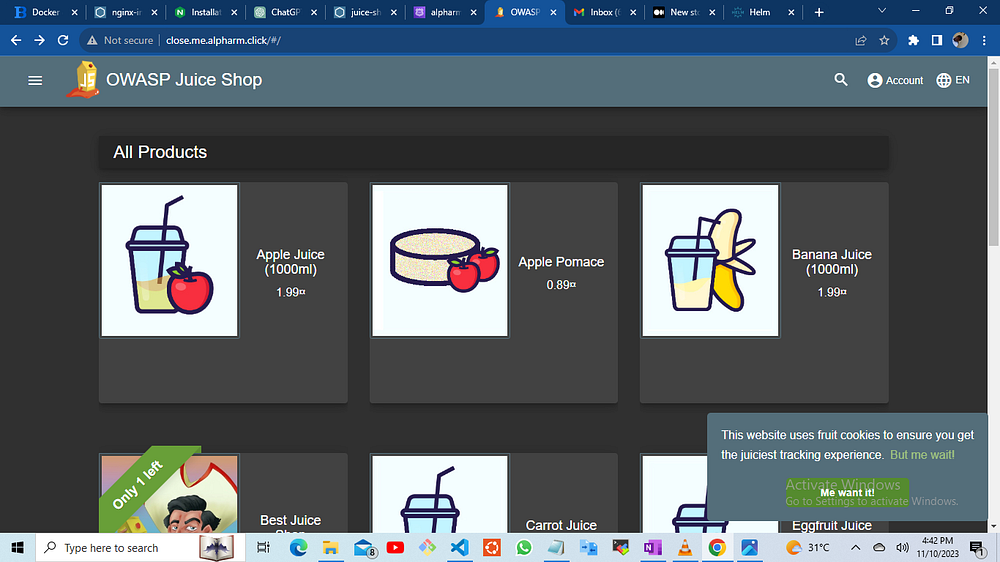
finally you can use the url to browse
Conclusion:
Congratulations! You’ve successfully deployed your application on Kubernetes using Helm and Nginx Ingress, and integrated it with AWS Route 53 for domain routing. This guide provides a comprehensive walkthrough for each step, making it easier for you to manage your Kubernetes-based applications.
