Deploying a scalable Kafka Architecture with an Sql database on Kubernetes Cluster
While at work, monitoring data streams became a hassle and more tedious as time goes then we opted to use real time data streaming service. and to achieve this goal we used apache Kafka as the distributed data streaming services which is fully managed , eliminates the need for us to handle infrastructure management, scaling, or maintenance tasks.
https://github.com/A-LPHARM/K8s-apache-kafka-strimzi
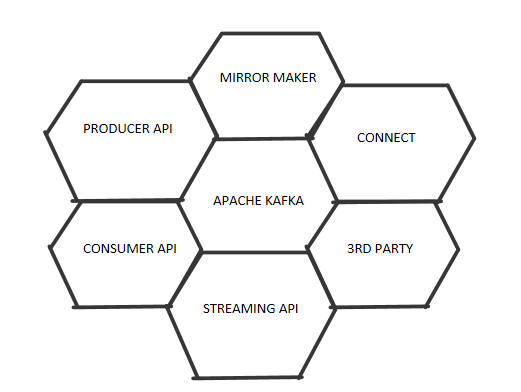
Kafka is a stream processing system used for messaging, website activity tracking, metrics collection and monitoring, logging, event sourcing, commit logs, and real-time analytics. It’s a good fit for large scale message processing applications since it is more robust, reliable, and fault-tolerant compared to traditional message queues.
Open-source Kafka or managed distributions are ubiquitous in modern software development environments. Kafka is used by developers and data engineers at companies such as Uber, Square, Strave, Shopify, and Spotify.
What is strimzi?
Strimzi simplifies the process in deploying and managing Apache Kafka in a Kubernetes cluster. As a Cloud Native Computing Foundation Sandbox project, it provides container images and Operators for running Kafka on Kubernetes environment.
Strimzi Operators are fundamental to this project. These Operators are built with purpose with special operational knowledge to effectively manage Kafka. The Operators are involved in Deploying and running Kafka clusters and components, Configuring and securing access to Kafka, Upgrading and managing Kafka and even taking care of managing topics and users
Summary of Kafka Components:
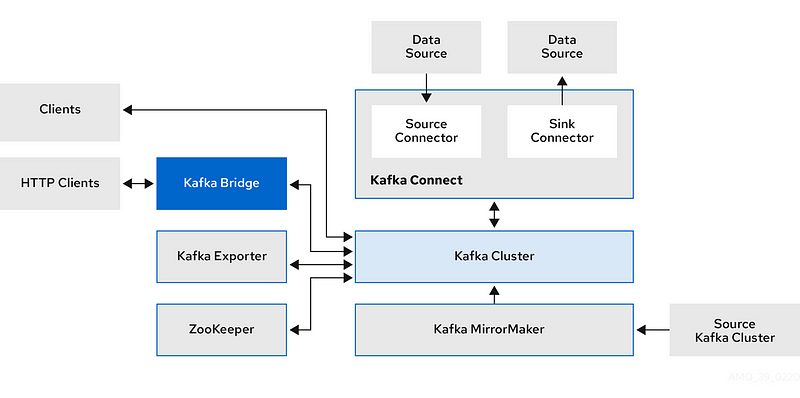
1. Broker:
- Orchestrates the storage and transmission of messages.
- Uses Apache ZooKeeper for storing configuration data and cluster coordination.
2. ZooKeeper Cluster:
- Consists of replicated ZooKeeper instances.
- Used by brokers for configuration storage and cluster coordination.
3. Topic:
- Provides a destination for storing data.
- Split into one or more partitions.
4. Kafka Cluster:
- Group of broker instances working together.
5. Partition:
- Splits a single topic log into multiple logs.
- Each partition can reside on a separate node in the Kafka cluster.
6. Kafka Connect Cluster:
- Facilitates external data connections.
7. Kafka MirrorMaker Cluster:
- Replicates data between two Kafka clusters.
- Operates within or across data centers.
8. Kafka Exporter:
- Extracts additional Kafka metrics data for monitoring.
- Provides metrics related to offsets, consumer groups, consumer lag, and topics.
9. Kafka Bridge:
- Enables HTTP-based requests to the Kafka cluster.
10. Use Cases of Kafka:
- Kafka is commonly used for real-time event streaming.
- It serves as a distributed messaging system for large-scale data processing.
- Kafka supports log aggregation and data integration in various applications.
11. Kafka Uses:
- Data streaming and real-time analytics.
- Messaging and communication between microservices.
- Handling large-scale data processing and analytics.
Pre-requisites:
Docker
Kubernetes
kubectl command
AWS cloud services
https://github.com/A-LPHARM/K8s-apache-kafka-strimzi
Step 1: Download and Extract Debezium MySQL Connector Archive
Begin by downloading and extracting the Debezium MySQL Connector archive using the following command:
sudo curl https://repo1.maven.org/maven2/io/debezium/debezium-connector-mysql/1.0.0.Final/debezium-connector-mysql-1.0.0.Final-plugin.tar.gz | tar xvz
Next, build your Docker image for Kafka Connect and the connector using the provided Dockerfile:
FROM strimzi/kafka:0.20.1-kafka-2.5.0
USER root:root
RUN mkdir -p /opt/kafka/plugins/debezium
COPY ./debezium-connector-mysql/ /opt/kafka/plugins/debezium/
USER 1001
Create Kafka Connector Using Docker Image
Use the Docker image to create your Kafka connector. Additionally, prepare a Dockerfile that incorporates the connector files into the Strimzi Kafka Connect image.
docker build . -t henriksin1/connect-debezium
docker push henriksin1/connect-debezium
Alternatively, utilize the specified Docker repository for the push operation.
deploy your kubenetes cluster using either EKS or Kops
eksctl create cluster — name test-cluster — version 1.21 — region us-east-1 — nodegroup-name linux-node — node-type t2.medium— nodes 2
or
kops create cluster — name henry-new-kops.k8s.local  \
 — cloud=aws — networking calico \
 — zones us-east-1a,us-east-1b,us-east-1c \
 — master-size t2.medium — node-size t2.medium \
 — node-count=3 — master-count=1
kops update cluster — name henry-new-kops.k8s.local — yes — admin
STEP 2
create namespace for all the deployments
kubectl apply -f 0-namespace.yaml
STEP 3
deploy strimzi operators from the operator lifecycle manager this simplifies the process to monitor the Kafka clusters
each operator manages Kafka and performs a separate function.
this installation deploys the custom resources definition CRD is an extension of the Kubernetes API that is not necessarily available in a default Kubernetes installation. It represents a customization of a particular Kubernetes installation.
basically we are customizing our resources for the operators to run effortlessly
to obtain the latest releases
curl -L https://github.com/operator-framework/operator-lifecycle-manager/releases/download/v0.26.0/install.sh -o install.sh
chmod +x install.sh
./install.sh v0.26.0
then you run
kubectl create -f https://operatorhub.io/install/strimzi-kafka-operator.yaml

step 4
deploy your secrets file this allows the connectors and Kafka have access into the data base and run the topics
cat <<EOF> debezium-mysql-credentials.properties
mysql_username: debezium
mysql_password: dbz
EOF
kubectl -n kafka create secret generic debezium-secret — from-file=secrets.properties
step 5
deploy the role-back access control
apiVersion: rbac.authorization.k8s.io/v1
kind: Role
metadata:
 name: kafka-connector-configuration-role
 namespace: kafka
rules:
- apiGroups: [“”]
  resources: [“secrets”]
  resourceNames: [“debezium-secret”]
  verbs: [“get”]
kubectl apply -f rbac-debezium-role.yaml
step 6
deploy the service account to combine with the RBAC and secrets
apiVersion: v1
kind: ServiceAccount
metadata:
  name: debezium-connect-cluster-connect
  namespace: kafka
kubectl apply -f serviceaccount.yaml
step 7
deploy the rbac cluster binding resources which binds the serviceaccount to the role

https://github.com/A-LPHARM/K8s-apache-kafka-strimzi/blob/main/4-rbac-cluster-binding.yaml
kubectl apply -f rbac-cluster-binding.yaml
step 8
deploy the kafka cluster we are using the
apiVersion: kafka.strimzi.io/v1beta2
kind: Kafka
metadata:
  name: my-cluster
  namespace: kafka
spec:
  kafka:
    replicas: 1
    listeners:
      - name: plain
        port: 9092
        type: internal
        tls: false
      - name: tls
        port: 9093
        type: internal
        tls: true
        authentication:
          type: tls
      - name: external
        port: 9094
        type: nodeport
        tls: false
    storage:
      type: jbod
      volumes:
      - id: 0
        type: persistent-claim
        size: 100Gi
        deleteClaim: false
    config:
      offsets.topic.replication.factor: 1
      transaction.state.log.replication.factor: 1
      transaction.state.log.min.isr: 1
      default.replication.factor: 1
      min.insync.replicas: 1
      inter.broker.protocol.version: '3.6'
  zookeeper:
    replicas: 1
    storage:
      type: persistent-claim
      size: 100Gi
      deleteClaim: false
  entityOperator:
    topicOperator: {}
    userOperator: {}
kubectl apply -f kafka-kluster.yaml
the kafka cluster will deploy all the topic operators and user operators and zookeepers

note confirm the cluster is running
kubectl wait kafka/my-cluster — for=condition=Ready — timeout=300s -n kafka
then you execute commands within the Kafka cluster to create and inspect topics, checking if they are consumed.
To produce a topic
kubectl -n kafka exec my-cluster-kafka-0 -c kafka -i -t -- bin/kafka-console-producer.sh --bootstrap-server my-cluster-kafka-bootstrap:9092 --topic my-topic

open another terminal to verify whether the topics are being consumed
kubectl -n kafka exec my-cluster-kafka-0 -c kafka -i -t -- bin/kafka-console-consumer.sh --bootstrap-server localhost:9092 --topic my-topic --from-beginning

Step 9:
After successfully deploying your Kafka cluster, proceed to deploy the MySQL database cluster. Once the database is deployed, apply the configuration from the ‘6-sql.yaml’ file using the following command:
https://github.com/A-LPHARM/K8s-apache-kafka-strimzi/blob/main/6-sql.yaml
kubectl apply -f 6-sql.yaml
To ensure the database is running and determine the endpoint port, execute:
kubectl describe service mysql -n kafka
Then, in another terminal, we can run the command line client:
exec into the database
kubectl exec -it mysql-6597659cb8-j9rk4 -n kafka -- sh
mysql -h mysql -u root -p
password:
mysql> use inventory;
mysql> show tables;
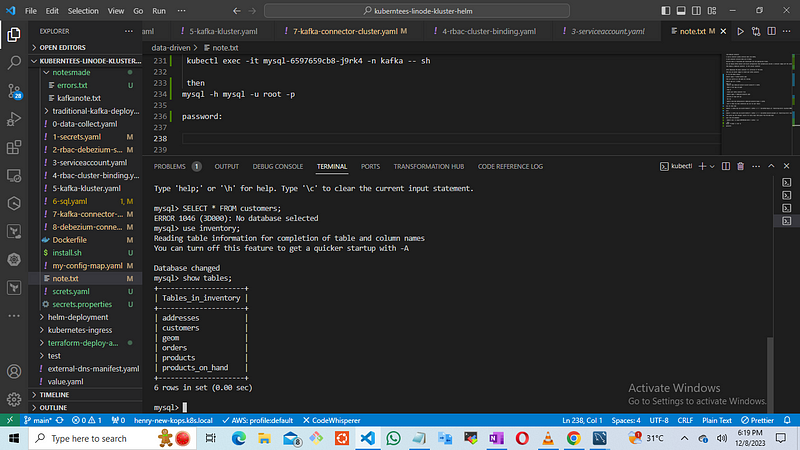
Utilize the obtained information to connect with your local MySQL Workbench.
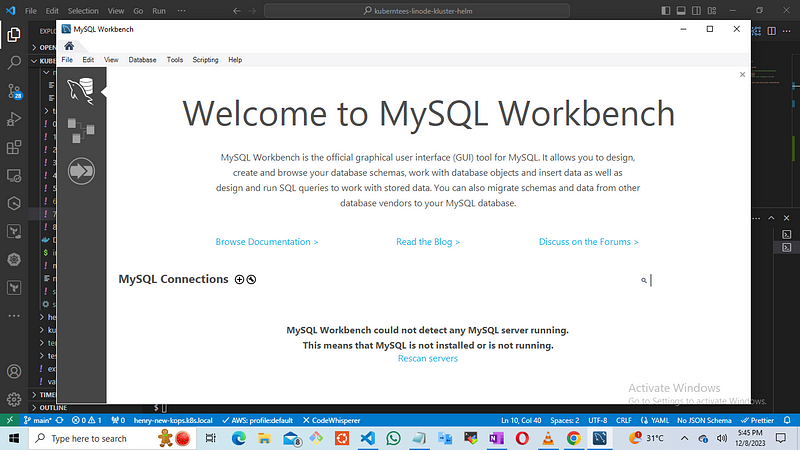
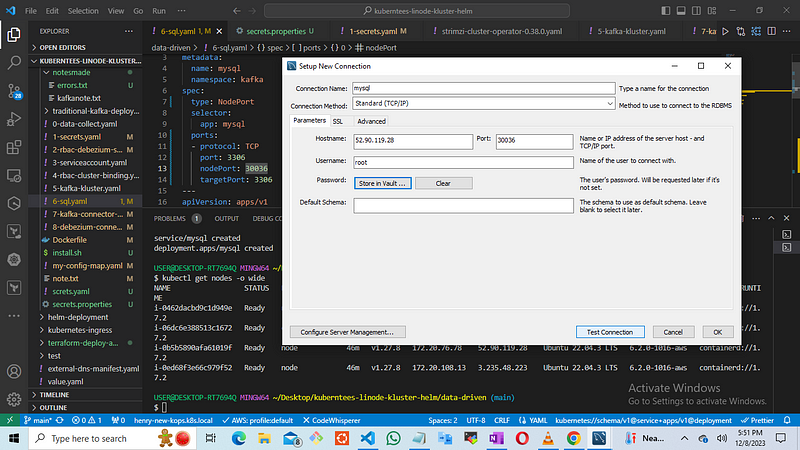
once it confirms successful you prepare your kafka-connect manifest file
Step 10
Deploying the debezium-connect wasnt easy after so many logging and troubleshooting to sort out the networking. Deploying a self-managed service does require more effort in terms of setting up and maintaining the cluster
apiVersion: kafka.strimzi.io/v1beta2
kind: KafkaConnect
metadata:
  name: debezium-connect-cluster
  namespace: kafka
  annotations:
    strimzi.io/use-connector-resources: "true"
spec:
  version: 3.6.0
  image: henriksin1/connect-debezium:v1
  replicas: 1
  bootstrapServers: my-cluster-kafka-bootstrap:9092
  config:
    # config.providers: secret
    # config.providers.secrets.class: io.strimzi.kafka.KubernetesSecretConfigProvider
    group.id: connect-cluster
    offset.storage.topic: connect-cluster-offsets
    config.storage.topic: connect-cluster-configs
    status.storage.topic: connect-cluster-status
    # -1 means it will use the default replication factor configured in the broker
    config.storage.replication.factor: 1
    offset.storage.replication.factor: 1
    status.storage.replication.factor: 1
    config.providers: file
    config.providers.file.class: org.apache.kafka.common.config.provider.FileConfigProvider
  externalConfiguration:
    volumes:
      - name: connector-config
        secret:
          secretName: debezium-secret
kubectl apply -f 7-kafka-connect.yaml
then you confirm all the pods are running
kubectl get all -n kafka
then run
kubectl logs debezium-connect-cluster-connect-0 -n kafka
check if the logs are good
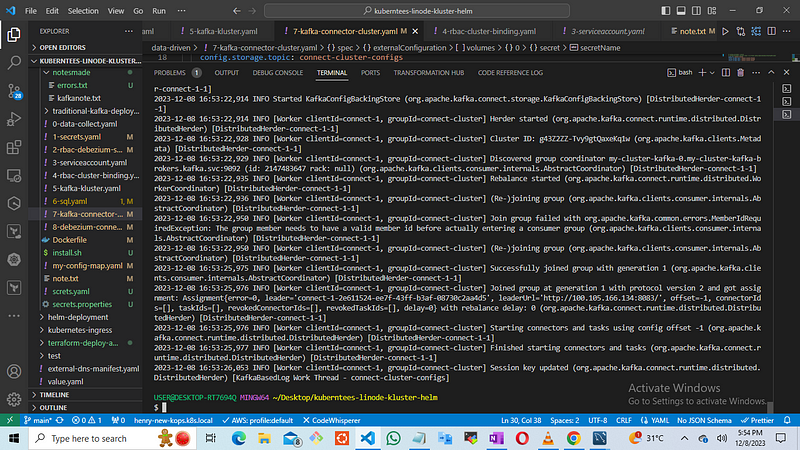
note: this explains the configurations in the Kafka connect
- the strimzi.io/use-connector-resources: “true” annotation tells the cluster operator that Kafka connector resources will be used to configure connectors within this Kafka Connect cluster.
The spec.image this image has to be built in your docker and deployed
the config.storage and config settings will use 1 as its replication factor because we created a single-broker Kafka cluster, more replicas we deploy more storage and config setting.
In the external configuration we’re referencing the secret we just created.
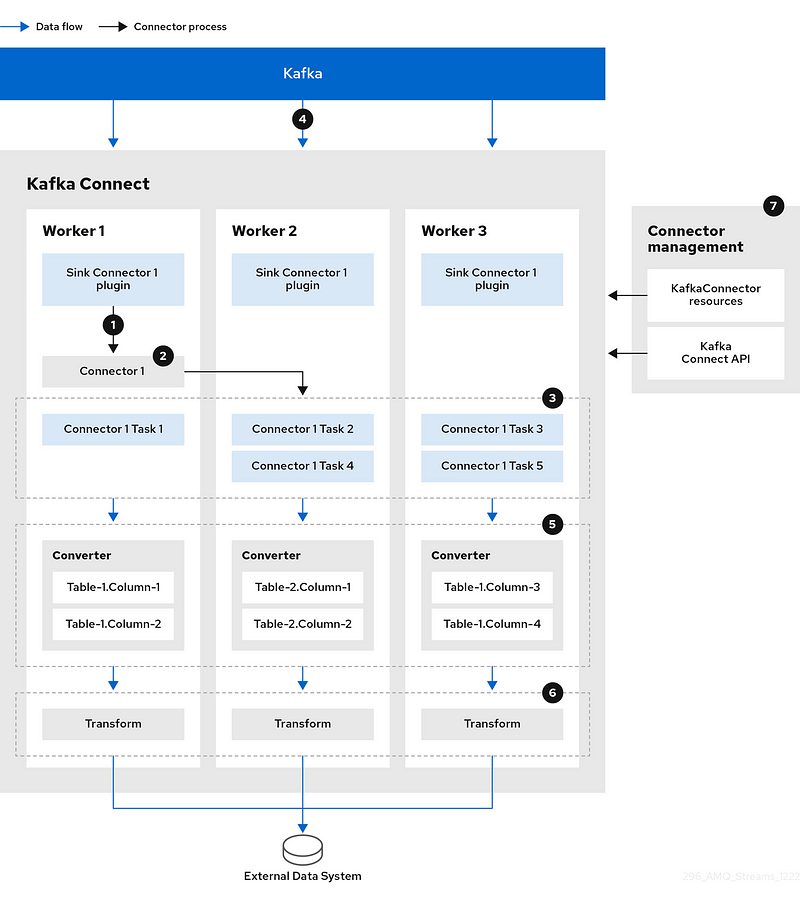
this diagram explains the movement of data from the database into the sink connector inside the kafka connect and how topics is sent to the kafka connector through the kafka connect API
then
Step 11.
create your kafka connector file
apiVersion: "kafka.strimzi.io/v1beta2"
kind: "KafkaConnector"
metadata:
  name: "debezium-connector-mysql"
  namespace: kafka
  labels:
    strimzi.io/cluster: debezium-connect-cluster
spec:
  class: io.debezium.connector.mysql.MySqlConnector
  tasksMax: 1
  config:
    database.hostname: 52.90.119.28 #1
    database.port: 30036 #2
    database.user: root  #3
    database.password: debezium  #4
    database.server.id: "184054"
    database.whitelist: "inventory"
    database.server.name: "mysql"   #5
    database.history.kafka.bootstrap.servers: "my-cluster-kafka-bootstrap:9092"
    database.history.kafka.topic: "schema-changes.inventory"
    include.schema.changes: "true"
    database.allowPublicKeyRetrieval: "true"
In metadata.labels, strimzi.io/cluster names the kafkaconnect cluster which this connector will be created in.
The spec.class names the Debezium MySQL connector and spec.tasks must be 1 because that’s all this connector ever uses.
The config object contains the rest of the connector configuration. The explains
- the database, hostname uses the ip of the mysql server as IP address for connecting to MySQL
2. The database port uses the ports which is gotten from the mysql database configuration which makes me use the node port
3. the file used for the database.user and database.passwrodis a placeholder which gets replaced with the referenced property from the given file in the secret we created.
4. the database.history.kafka: schema-changes.inventor configured debezium to use the schema-changes.inventory topic to store the database schema history
kubectl apply -f debezium-connector.yaml

the run
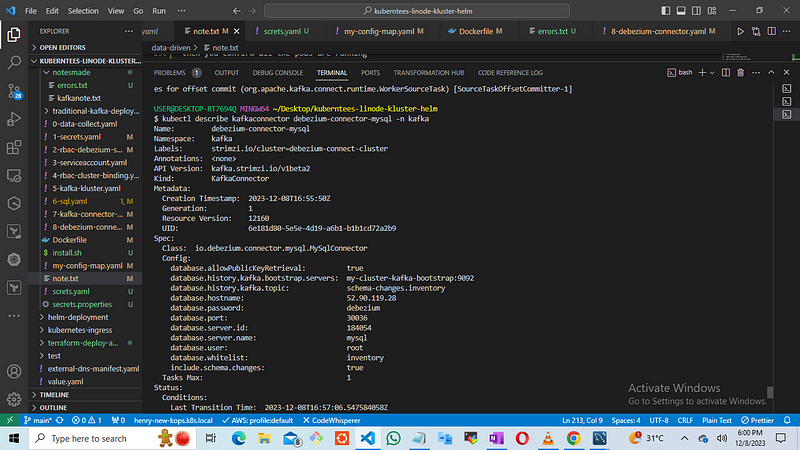
kubectl describe kafkaconnector debezium-connector-mysql -n kafka
once it shows you have connection you can run your topics
TIME FOR WORK
kubectl -n kafka exec my-cluster-kafka-0 -c kafka -i -t -- bin/kafka-topics.sh --bootstrap-server localhost:9092 --list
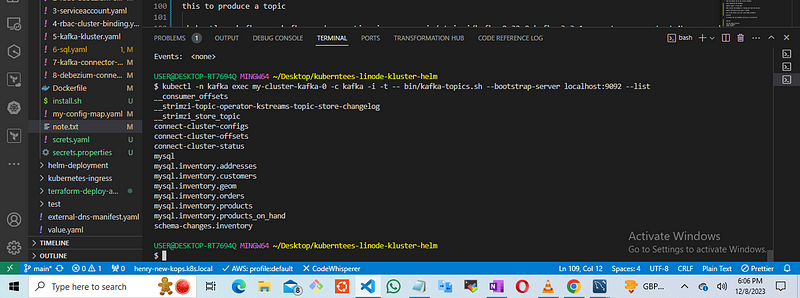
this gives you the consumer results for every topic that’s given from the data base
return to the terminal having the sql data base thats is on hold
then input this command
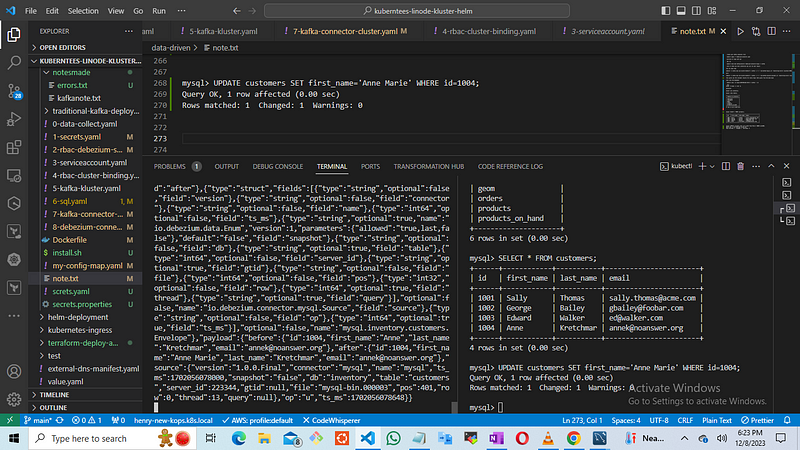
mysql> SELECT * FROM customers;
in another terminal run
kubectl -n kafka exec my-cluster-kafka-0 -c kafka -i -t -- bin/kafka-console-consumer.sh --bootstrap-server localhost:9092 --topic mysql --from-beginning
